Deployment View  
HOWTO video on Deployment View

Upon login, the user will reach the Deployment View.
In general, Deployment View is where a user can update a single target device or small groups of target devices and also observe a number of statuses and other information. The following describes the purpose of the different containers within the Deployment View.
- Filters: Only specific target devices will be displayed using filtering by Tag or Device Status (Simple Filter), by Query (Custom Filter) or Target Type (Type Filter).
- Targets: Target devices will be listed here based on the currently applied filter.
- Distributions: Drag and drop pre-configured distribution sets (one or more updates) to a single target device or group of target devices.
- Filter by Tag: Only specific Distributions will be displayed by applying Tags.
- Action History: Displays each software update event for the selected Target Device. There are five fields of data: Active, Distribution set, Date and Time, Status, Forced and Actions.
Note
Updating the selected target device(s) to a specific distribution is done by drag-and-drop.
Filters
If a filter has greyed out, this means that the particular filter has been enabled/selected.
Create/Update a Tag (Targets)

Clicking the gear icon will allow the user to either create a new, or update a current Simple Filter. Simple Filters can be applied to Target Device or Rollout parameters.
Close

Clicking the close icon will close the container.
Filter

To open the Filters container again, click the filter icon in the Targets container.
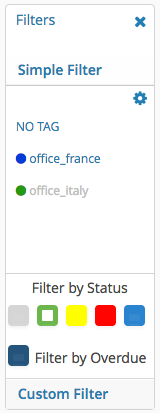
Simple Filter
To filter Target Devices by Status, click on a color icon in the Filter by Status section.
- Green - Synchronized
- Yellow - Pending
- Red - Error
- Blue - Registered
- Dark Blue - Overdue
Custom Filter
Custom filters can also be created by clicking: Custom Filter.
Target Filter
To create a Target Filter:
- select the Type Filter section
- click the gear icon to create a new filter
- type the desired Target Type in the name field
- assign Distribution types that are compatible with the Target Type. Distributions that are not in the compatible list cannot be applied to the specified Target Type.
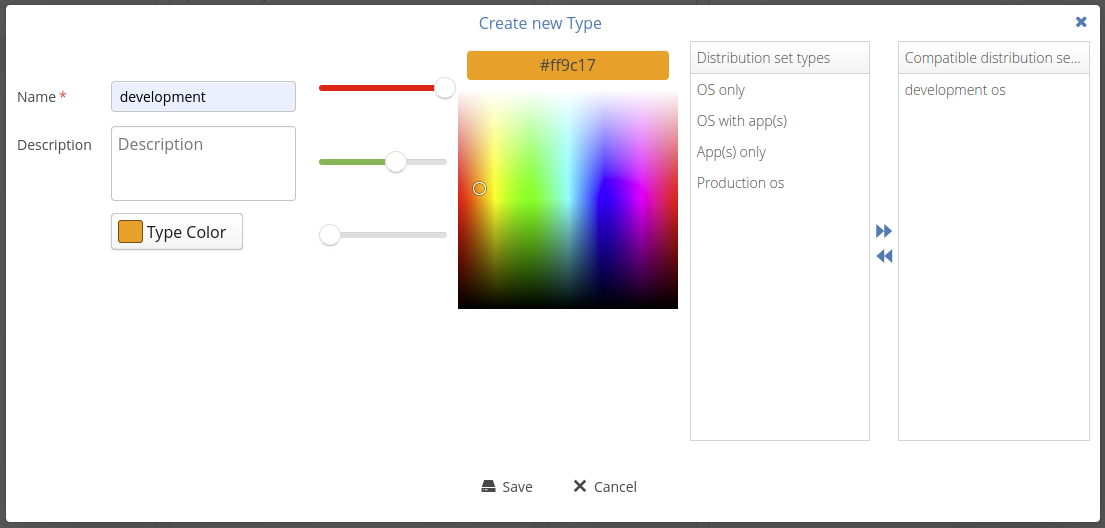
To filter targets by their Target Type select the corresponding filter.

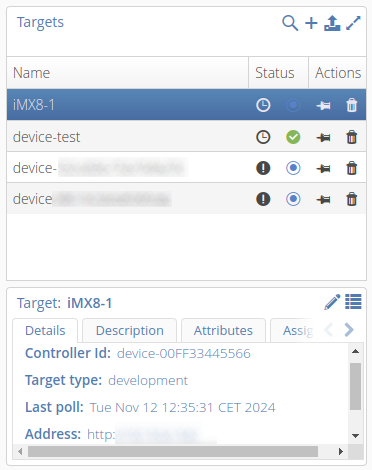
Targets
This view lists the registered target devices. Throughout the documentation the term "device" is used as a synonym of "target".
Search
![]()
Clicking the Search icon will enable the user to query by any string inside the container.
Add
![]()
By clicking the Plus icon, the user can configure a New Target.
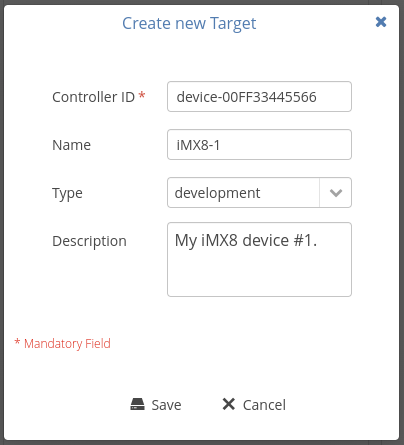
This is a manual procedure to create one target device at a time before it connects for the first time to Update Factory.
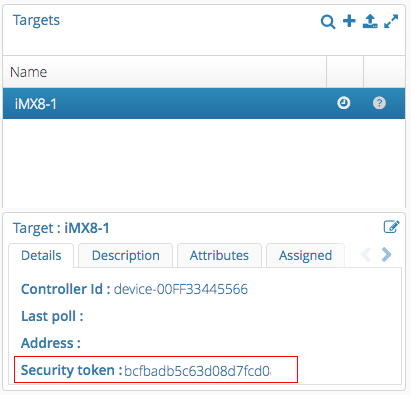
Security Token
The Security Token can be used to authenticate a device.
Users with the appropriate permission can retrieve the device Security Token (Target Token), as seen here:
Bulk Upload

For situations where you may have more than one device that you want to create in advance, you will use the Bulk Upload tool. Click the icon above, and then at the bottom of the next popup window, click the Bulk Upload button:

This open a browse window where you will need to provide a CSV formatted file, with the following format:
Controller_id_1,targetName1
Controller_id_2,targetName2
...
...
Expand / Shrink Container


Clicking the Expand icon will increase the size of the particular container. To go back to the small size, the user can click the Shrink icon.
Edit Target Device Info

Clicking the Edit icon in the lower container allows the user to make changes to a Target Device’s Name and Description.
Delete a Target Device  
![]()
Clicking the Trash icon in front of a Target Device, will delete the Target Device. Additionally, confirmation is required.
Multiple targets can be selected and deleted at once.
Distributions
Search
![]()
Clicking the Search icon will enable the user to query by any string inside the container.
Shrink / Expand Container
Clicking the Expand icon will increase the size of the particular container. To go back to the small size, the user can click the Shrink icon.
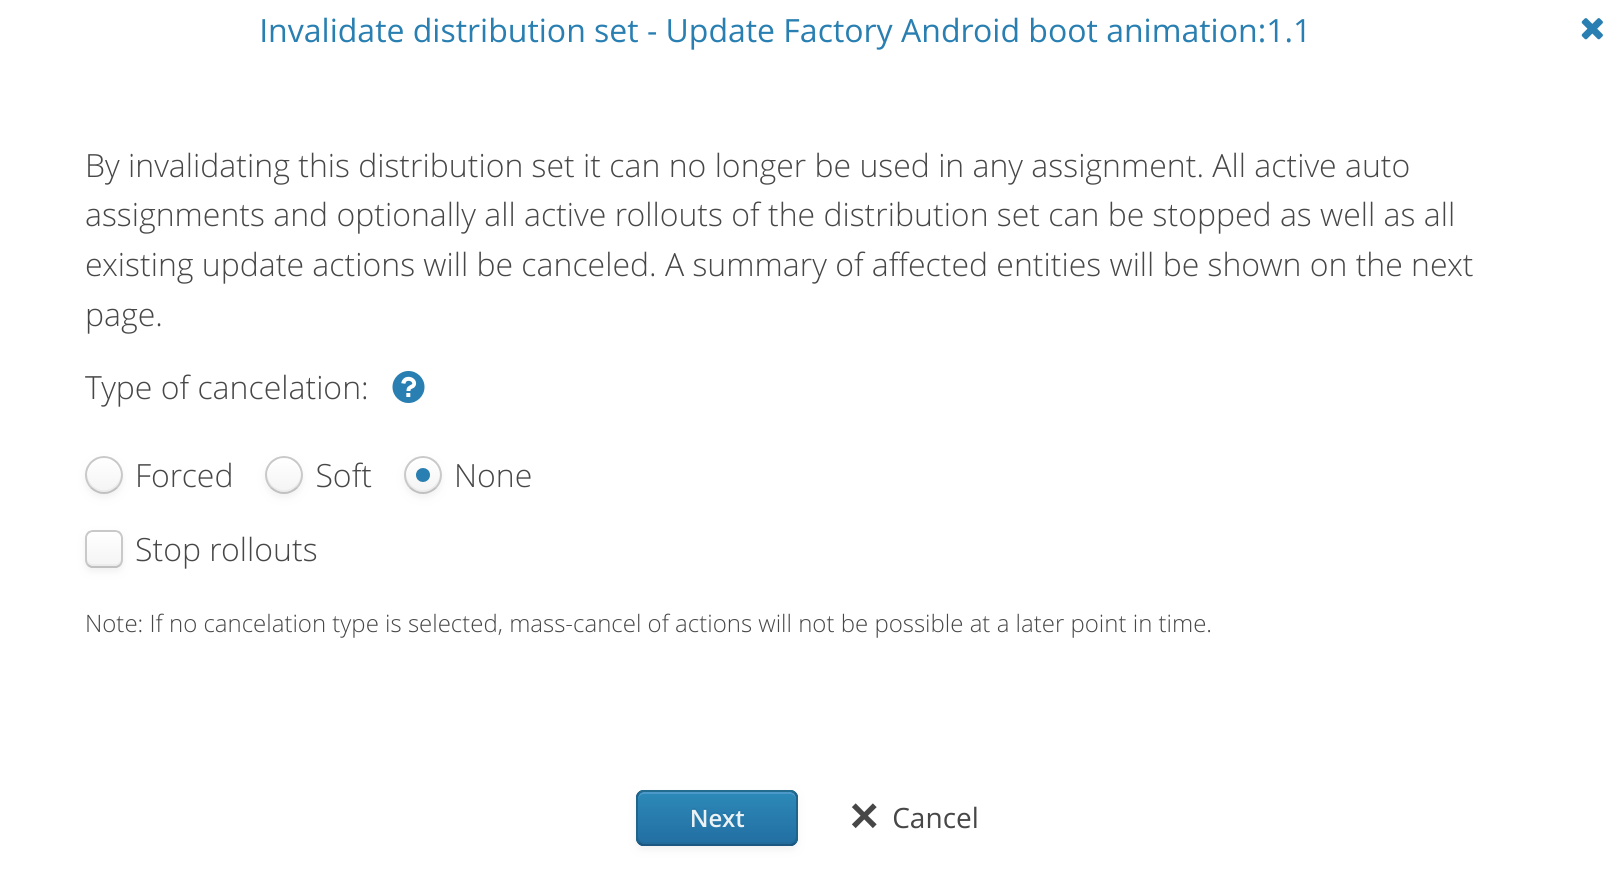
Invalidate

It is possible to invalidate a Distribution by clicking the Deny icon in the Distributions column. When invalidated a Distribution Set can no longer be used in any assignment.
Auto assignments of the Distribution Set will be stopped. Optionally, update actions and active rollouts can be canceled as well.
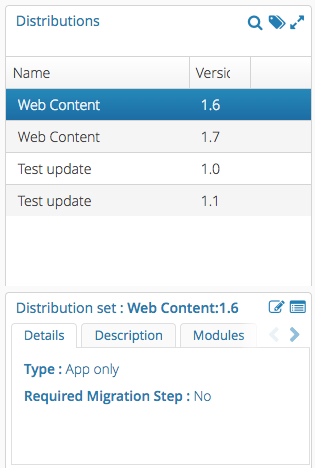
Edit Distribution info
Clicking the Edit icon in the lower container allows the user to make changes to the currently selected Distribution including: Type, Name, Version, Description and whether the particular Distribution is a Required Migration Step.
Edit Metadata

Clicking the Manage Metadata icon in the lower Container allows the user to make changes to Meta data regarding the currently selected Distribution.
Filter
To open the Filter by tag container, click the filter icon in the Distributions container.
Filter by tag
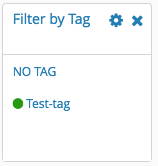
Create/Update a Tag (Distributions)
The Gear icon is used for editing Tags for distributions.
Close
The Close icon will close the Filter by tag container.
If a Tag has greyed text, this means that the tag is selected/enabled.
Confirm Assignment
Drag and drop can be used to apply a Distribution to a specific device.
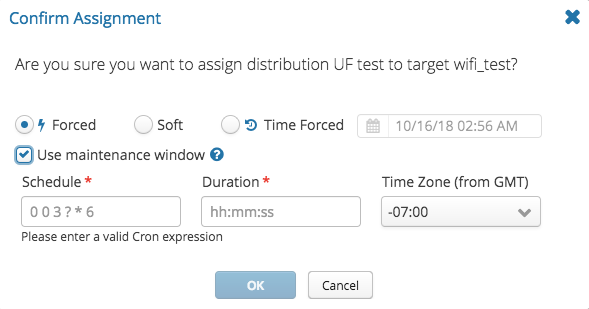
Once you finish dragging a distribution to a device, a new popup window appears titled: Confirm Assignment.
Here, you have the option on how and/or when you prefer to cause the device to be updated using one of three options: Forced, Soft or Time Forced. These options behave as follows:
- Forced: Apply the distribution to the chosen device without asking for any confirmation from the end user.
- Soft: Apply the distribution to the chosen device asking the end user to:
- authorize the download
- authorize the installation of the update, when the download is complete
- Download Only: Download the distribution to the device and let the application handle the artifact. UF Android Service will ask confirmation only to install the update soft update.
- Time Forced: Apply the distribution to the chosen device as a "Soft" update at first. The update is converted to "Forced" at the specified date and time, bypassing any pending end user authorization.
By enabling the Use maintenance window option, the installation of the update is allowed only when the maintenance window is open. A maintenance window is open or closed based on the parameters specified in the Schedule.
Client implementations
The behavior described for the different update types is what is supposed to be implemented by client software installed in the device. However the actual behaviour depends on the features that are implemented in client. For example, a client that does not support Soft updates may treat a Soft update assigned by the server as a Forced update.
User Consent Flow
The Confirmation required option will only be visible if the Request confirmation for actions feature is enabled in the System configuration.
This option is intended to prompt the end user of a device for confirmation before each software update is applied. Third-party applications using the UF-client-service-api should handle this confirmation process.
Warning
This feature is currently not supported by UF Android Service. Enabling this option will result in the deployment action not being received by the device.
Maintenance Window Schedule
The Schedule field uses what are called "cron expressions", which define firing schedules. For example: "At 10:00pm every Sunday through Wednesday" (0 0 22 ? * SUN-WED) or "At 1:45am every last Friday of the month" (0 45 1 ? * 6L).
Schedule Format
A cron expression is a string comprised of 6 or 7 fields separated by white space. Fields can contain any of the allowed values, along with various combinations of the allowed special characters for that field. The fields are as follows:
| Seconds | Mandatory | Allowed Values | Allowed Special Characters |
|---|---|---|---|
| Seconds | YES | 0-59 | , - * / |
| Minutes | YES | 0-59 | , - * / |
| Hours | YES | 0-23 | , - * / |
| Day of month | YES | 1-31 | , - * ? / L W |
| Month | YES | 0-11 or JAN-DEC | , - * / |
| Day of Week | YES | 1-7 or SUN-SAT | , - * ? / L # |
| Year | NO | empty, 1970-2099 | , - * / |
Duration
Specifies for how long the maintenance window is open after each cron schedule match.
The duration is specified in hh:mm:ss format.
Time Zone
Here you can define the reference timezone used to calculate the cron schedule.
Repeating distribution assignment
Update Factory doesn't allow the installation of the same distribution (same name, same version) if it has just been applied successfully.
It is important to note that:
- it is possible to apply a distribution with the same set of software modules, as long as the name and / or the version of the distribution is different. This can be used as a workaround to force the installation of the same update of the last installed distribution.
- it is possible to apply the same distribution if it has been applied in the past, but it is not the last successful update
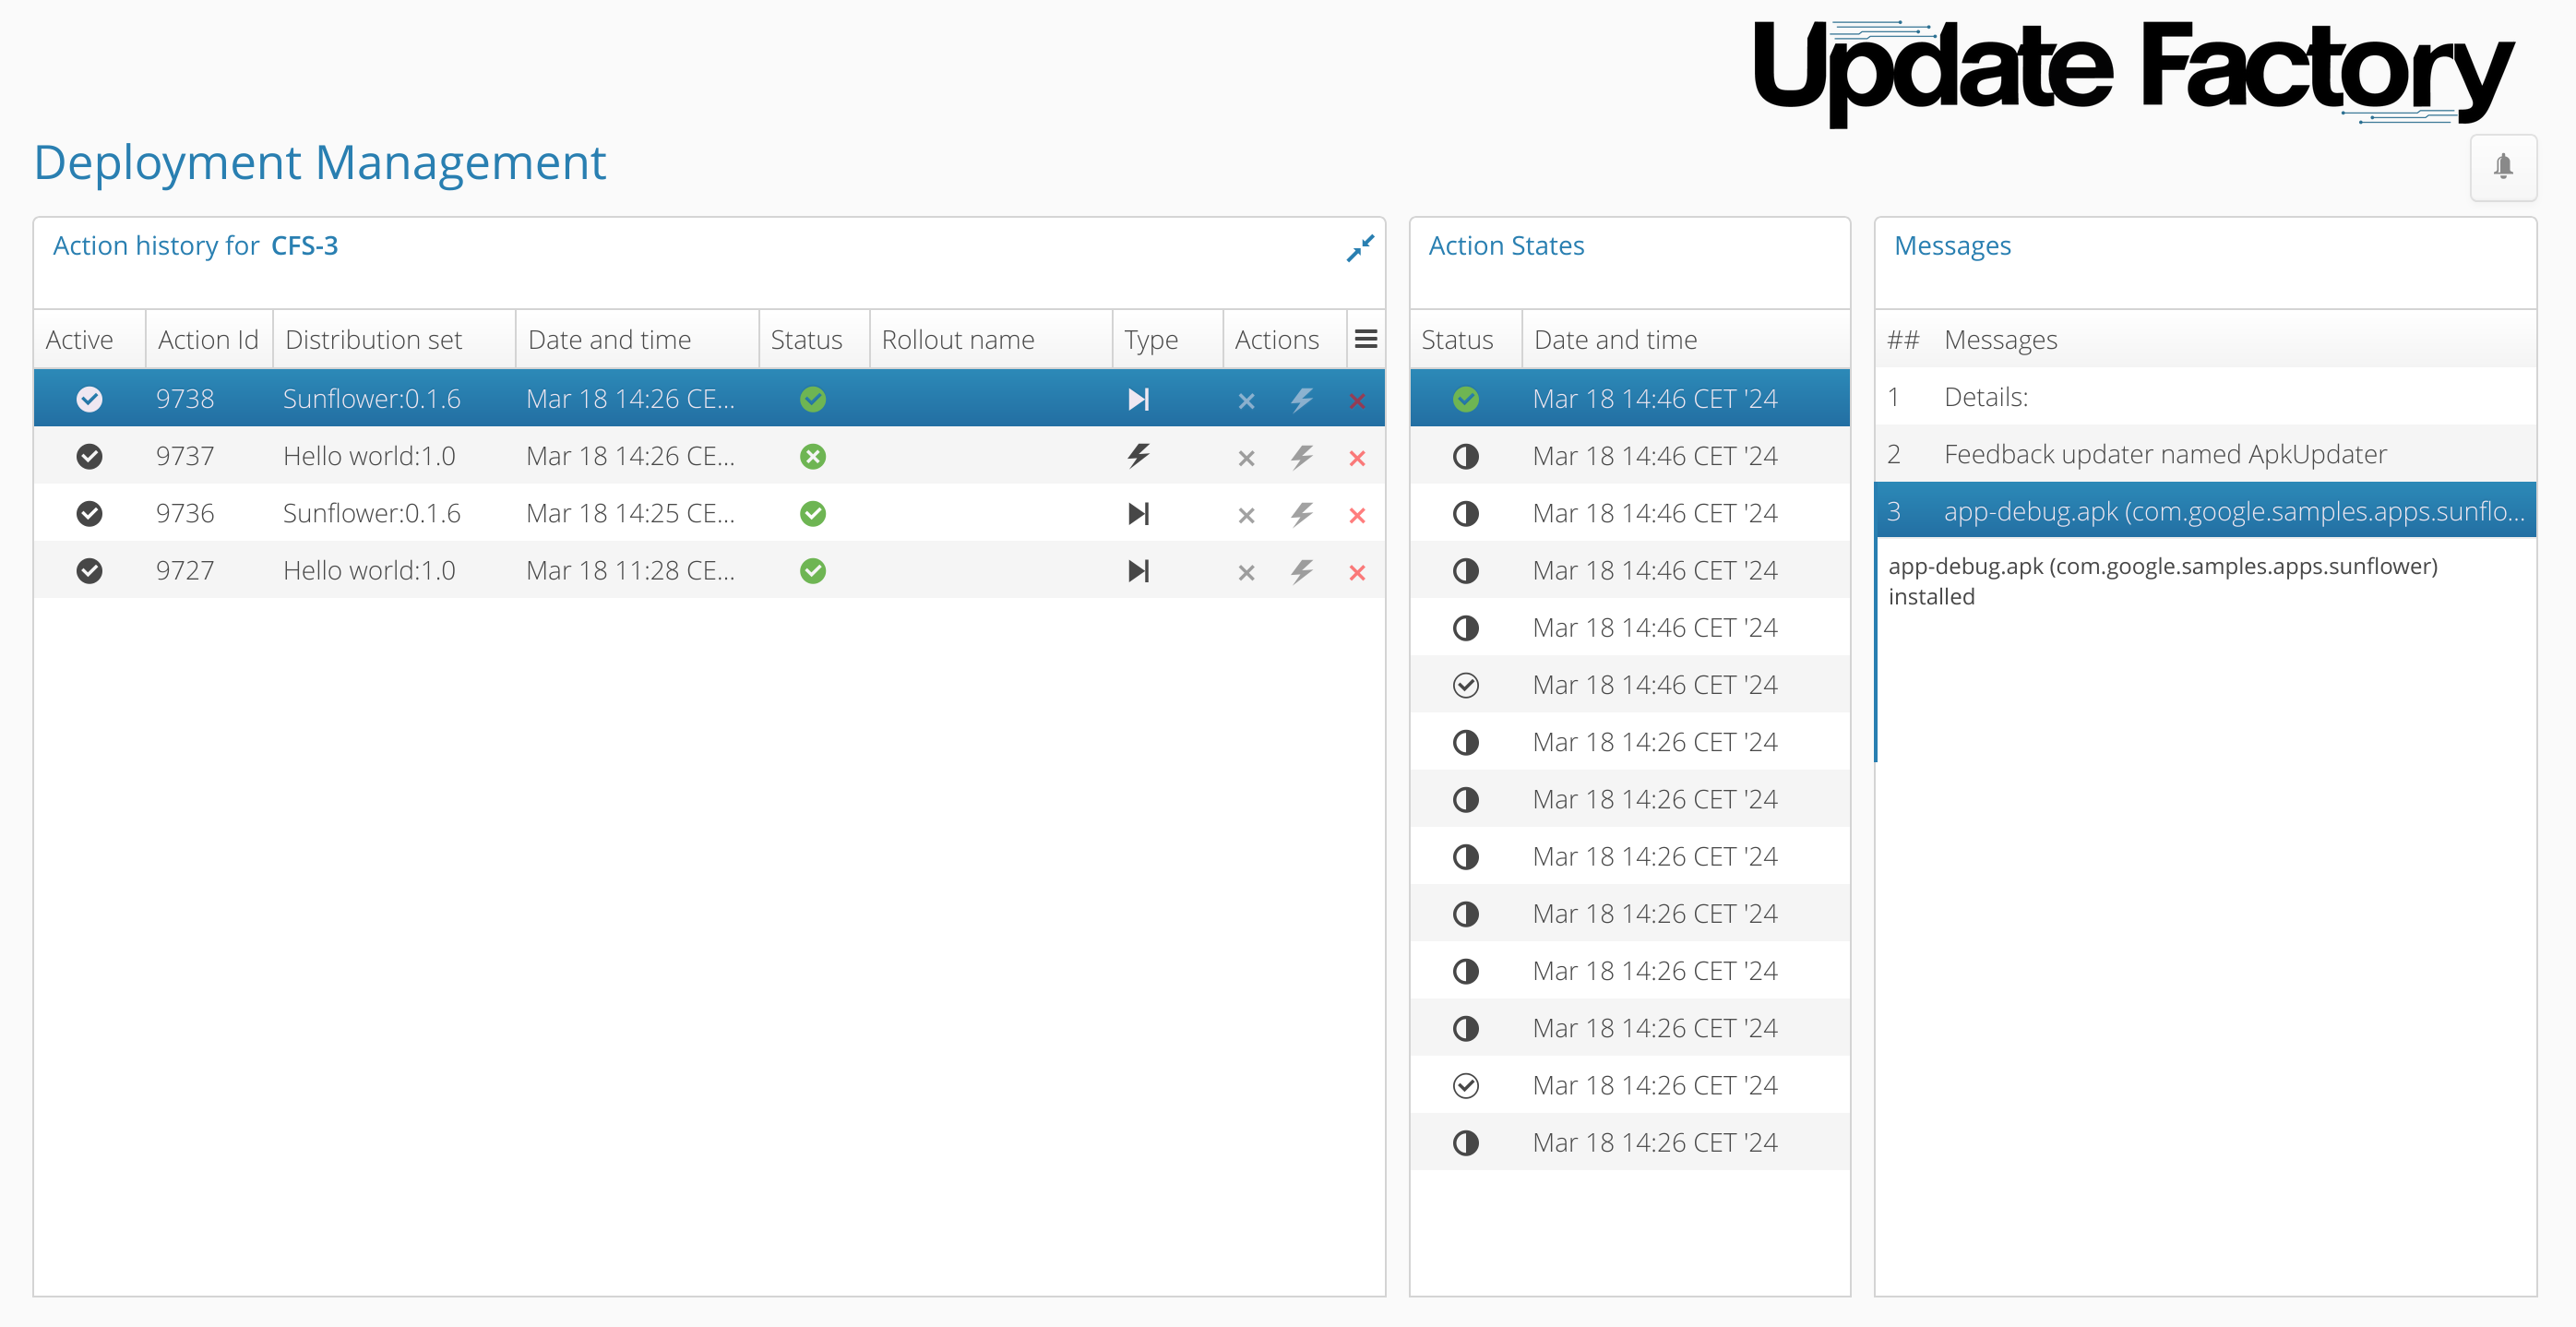
Action History
The Action History panel shows the list of Actions of a target device.
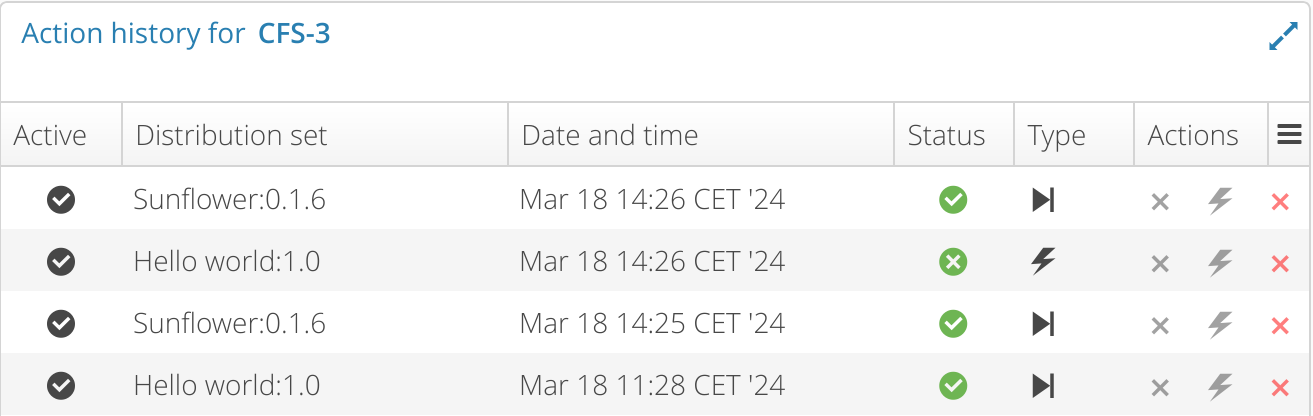
The Expand icon opens the Action History details page that provides status and progress details about the update process.
Action History details
The Action History page allows to:
- select any past or pending Action
- perform actions on Pending Actions (Cancel, Force Quit or switch from Soft to Forced)
- see the chronological list of Action States
- see the feedback Messages provided by the target device for each Action State